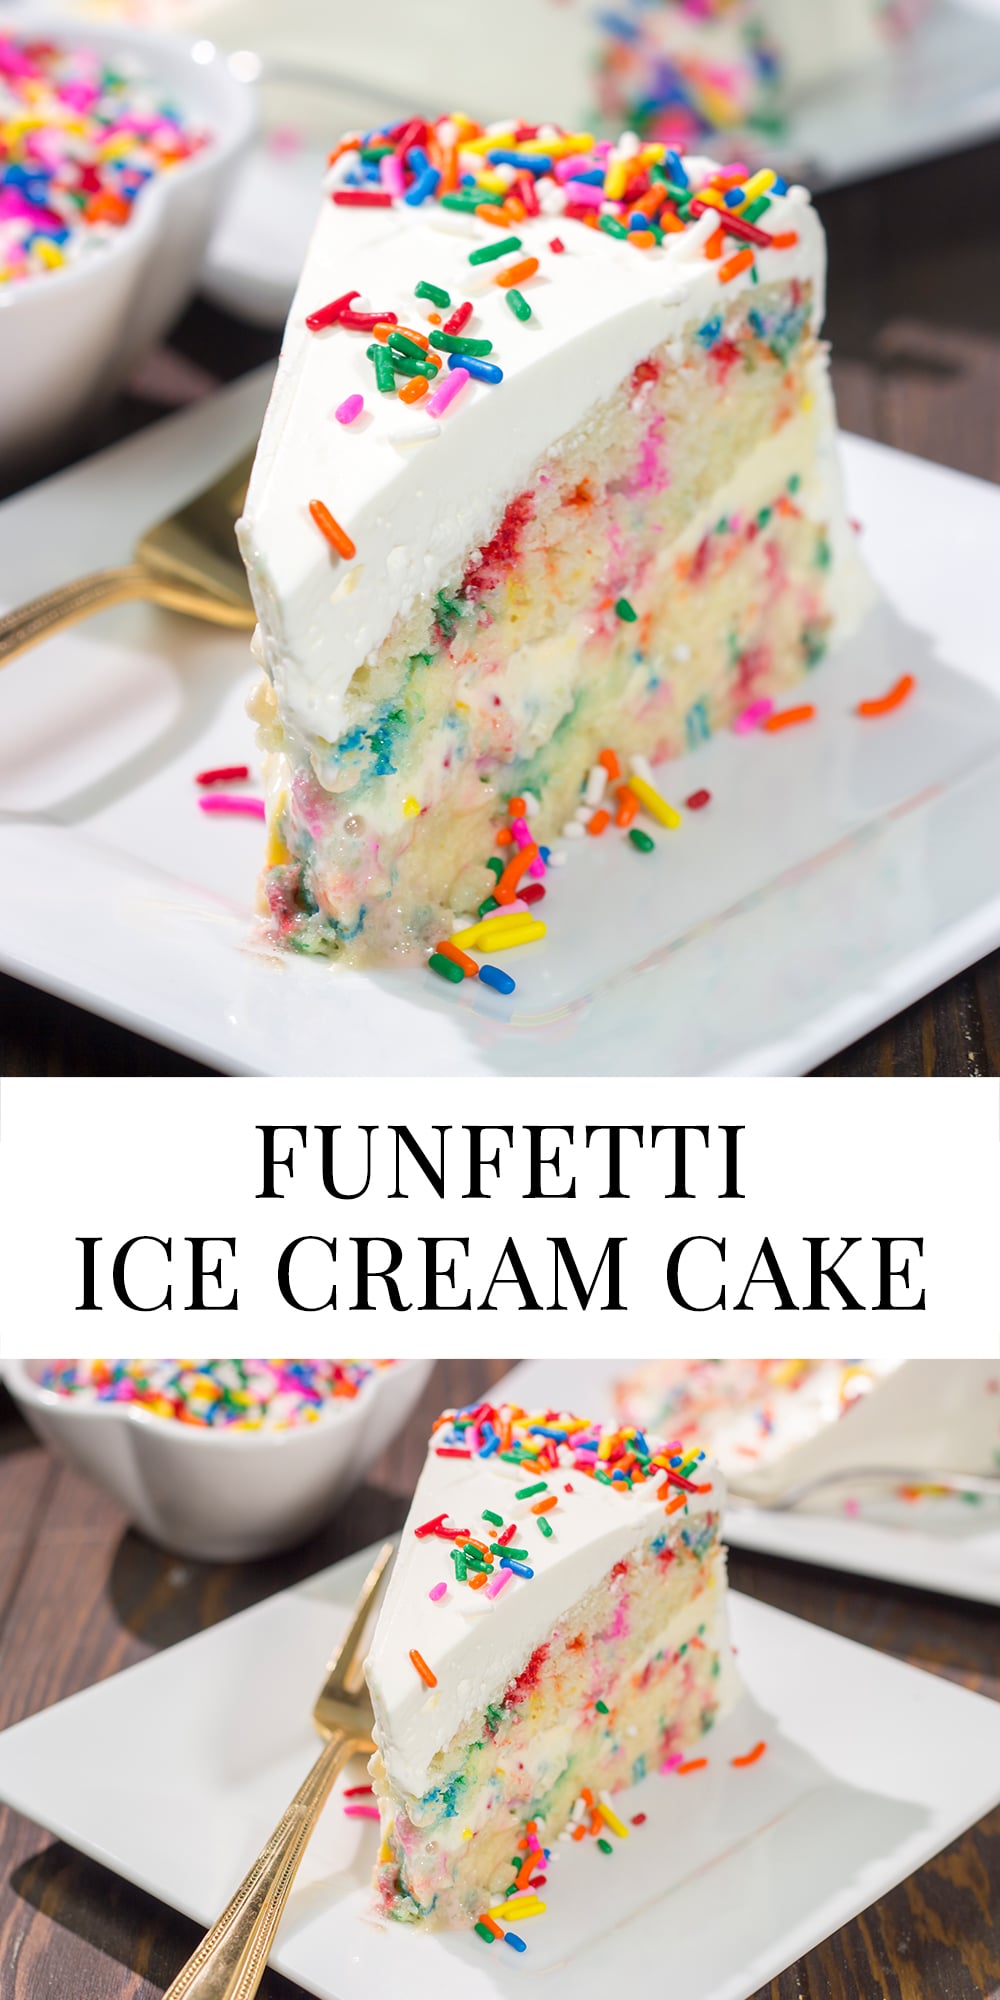
Funfetti Ice Cream Cake
Why pick between cake and ice cream? A slice of Funfetti Ice Cream Cake is an instant party!
This post may contain paid links. For more information, please see our disclosure policy.
Why should you have to pick between cake and ice cream? With this Funfetti Ice Cream Cake, you get the best of both worlds! I remember going to birthday parties back when I was a kid. It was often at a video game arcade in the mall (remember those!?), and a piece of cake with a scoop of ice cream on the side was standard fare. In fact, if you didn’t have cake and ice cream at your birthday party, you’d probably get some strange looks from your friends.
These days? I don’t feel like cake + ice cream is a thing anymore. We’ve been to plenty of parties with our son, and cupcakes seem to be the thing. I get it. Cupcakes are easier to make and serve. But cake and ice cream is a classic combo for a reason!
Funfetti Ice Cream Cake
The other night, we were having a fun dinner conversation about our favorite desserts. My son chimed in that Funfetti Cake is his favorite. I added that a good bowl of ice cream (especially in the summer months) is pretty high on the list. That led to a discussion about ice cream cakes…which inevitably then led to me making this Funfetti Ice Cream Cake.
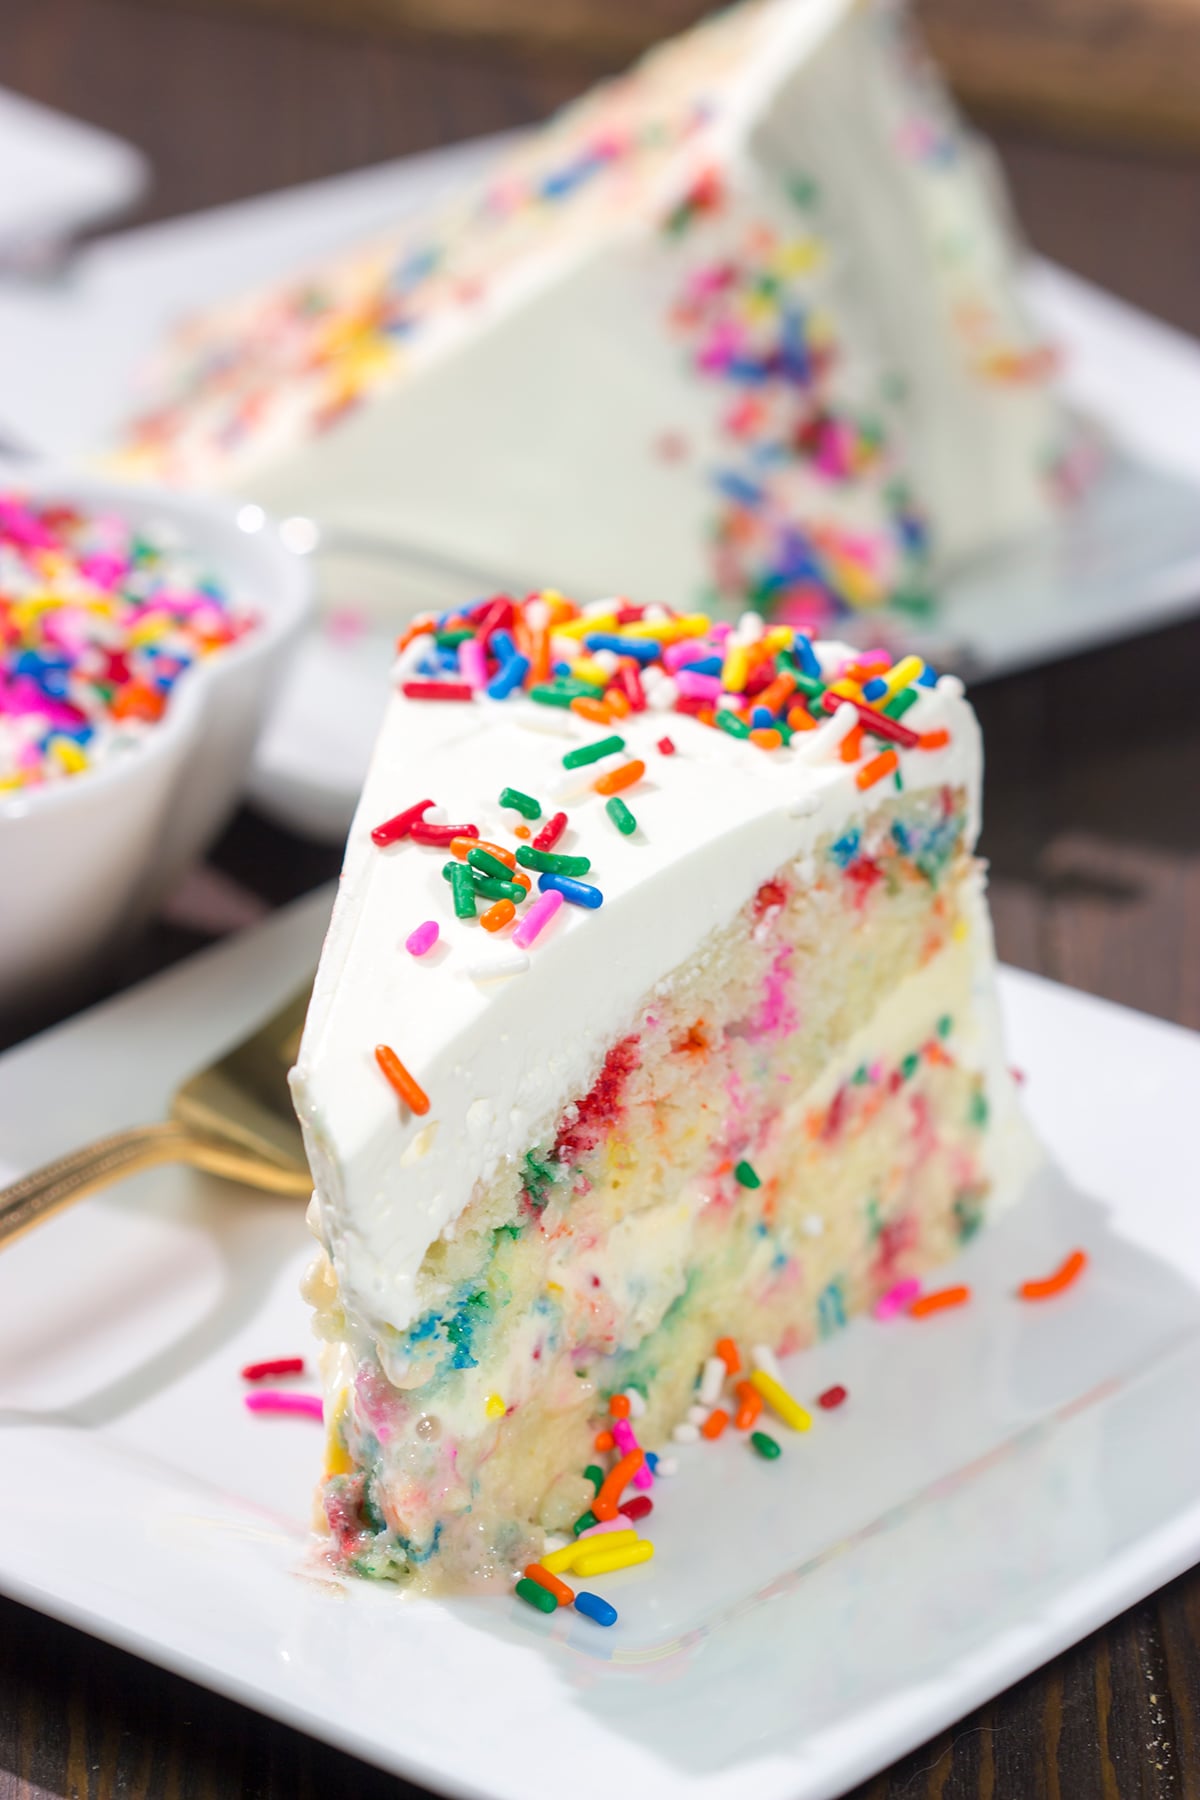
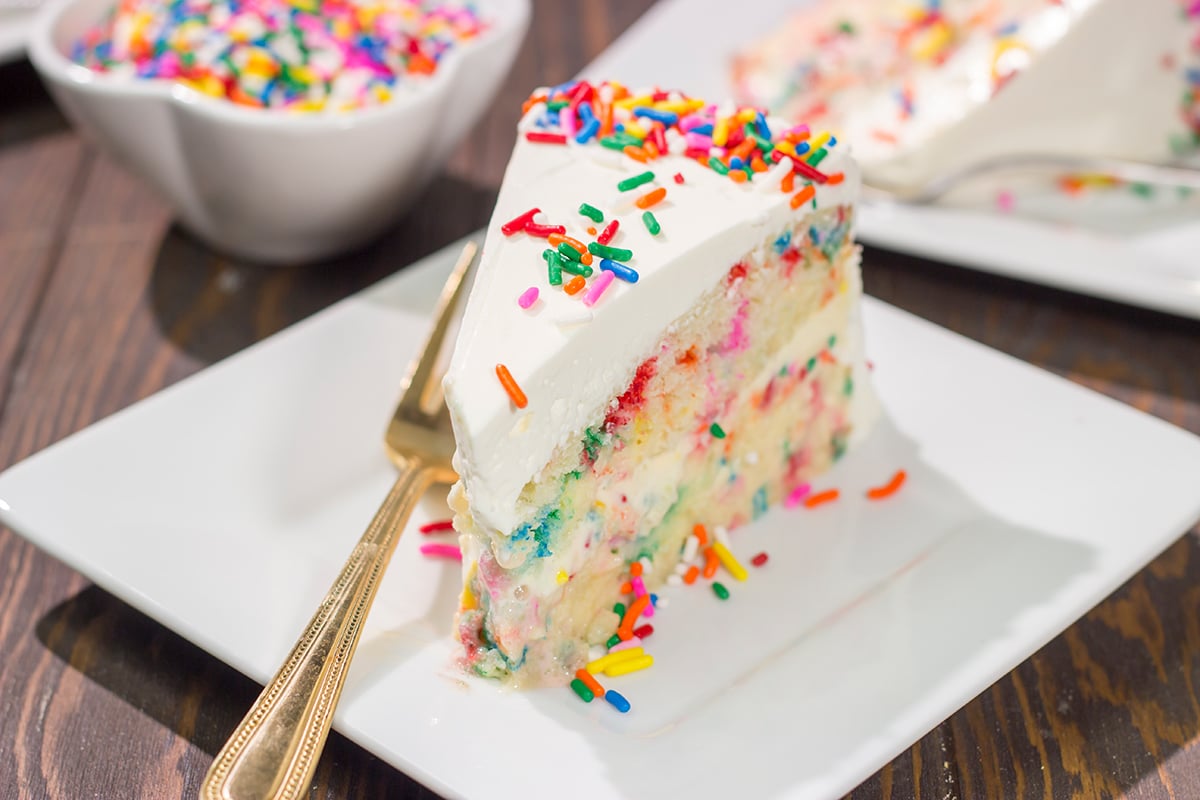
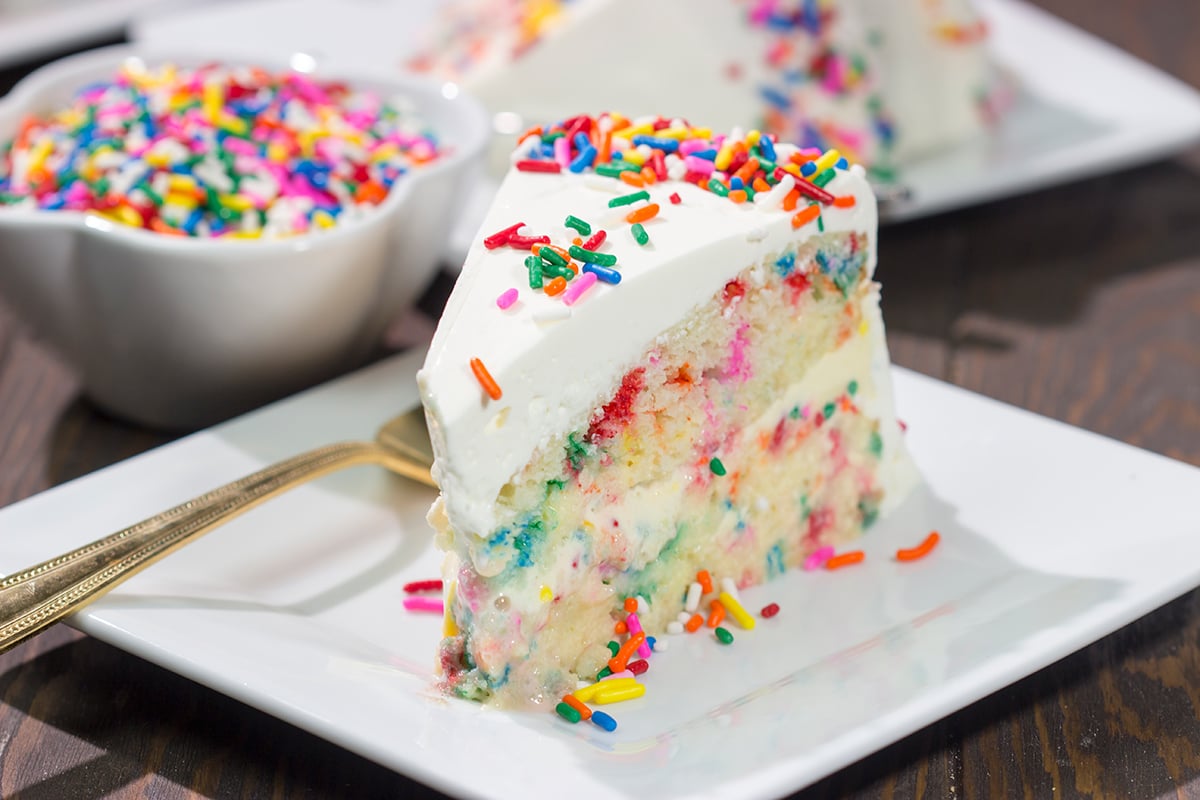
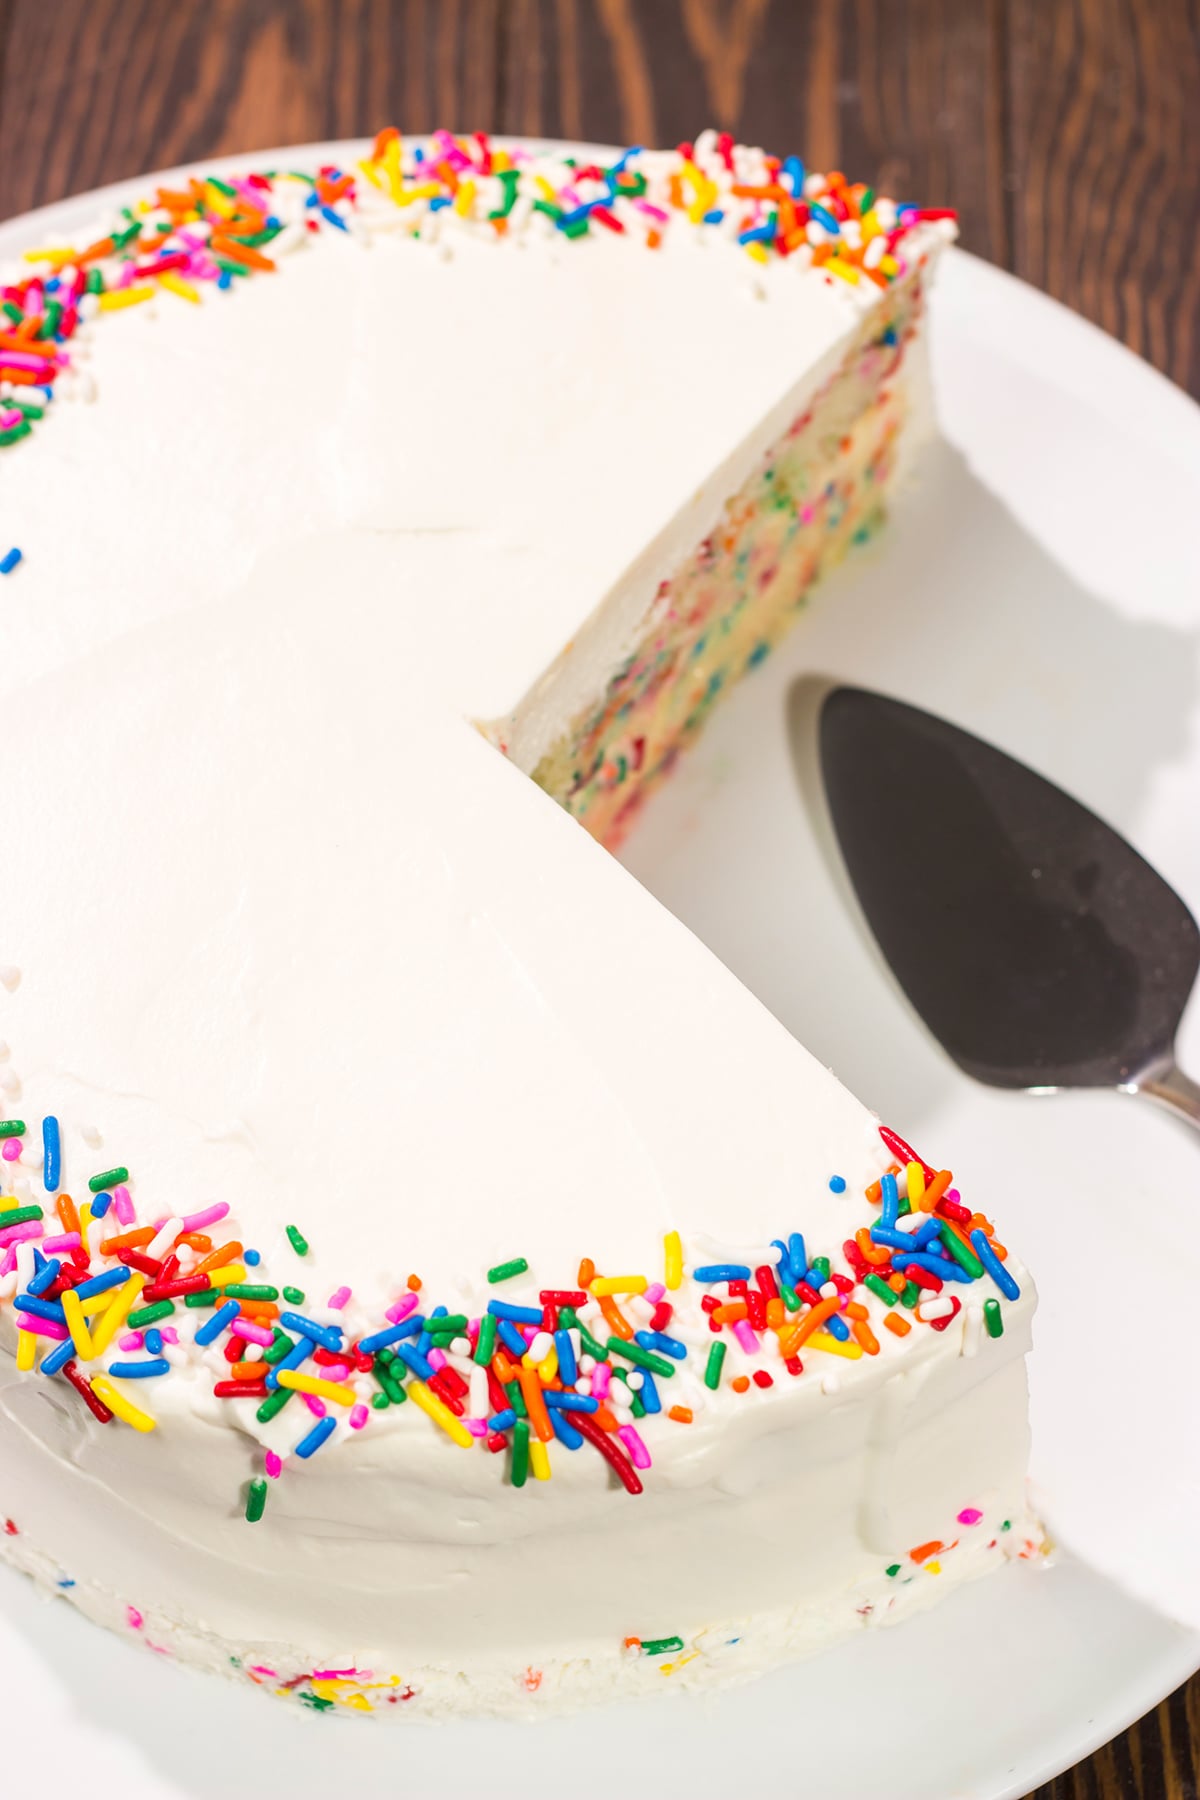
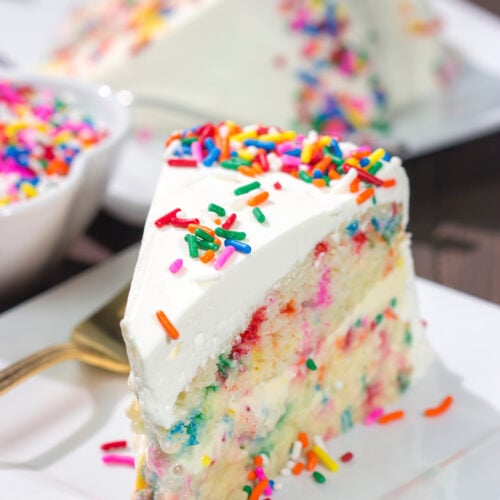
This cake is amazing, y’all! Seriously. It features two layers of homemade Funfetti cake and another layer of vanilla ice cream. Then the whole thing gets covered in a whipped cream frosting. Normally I’m not one for whipped frostings, but this one gets frozen…and it’s delicious. Plus a heavy buttercream frosting on this cake would just be too much.
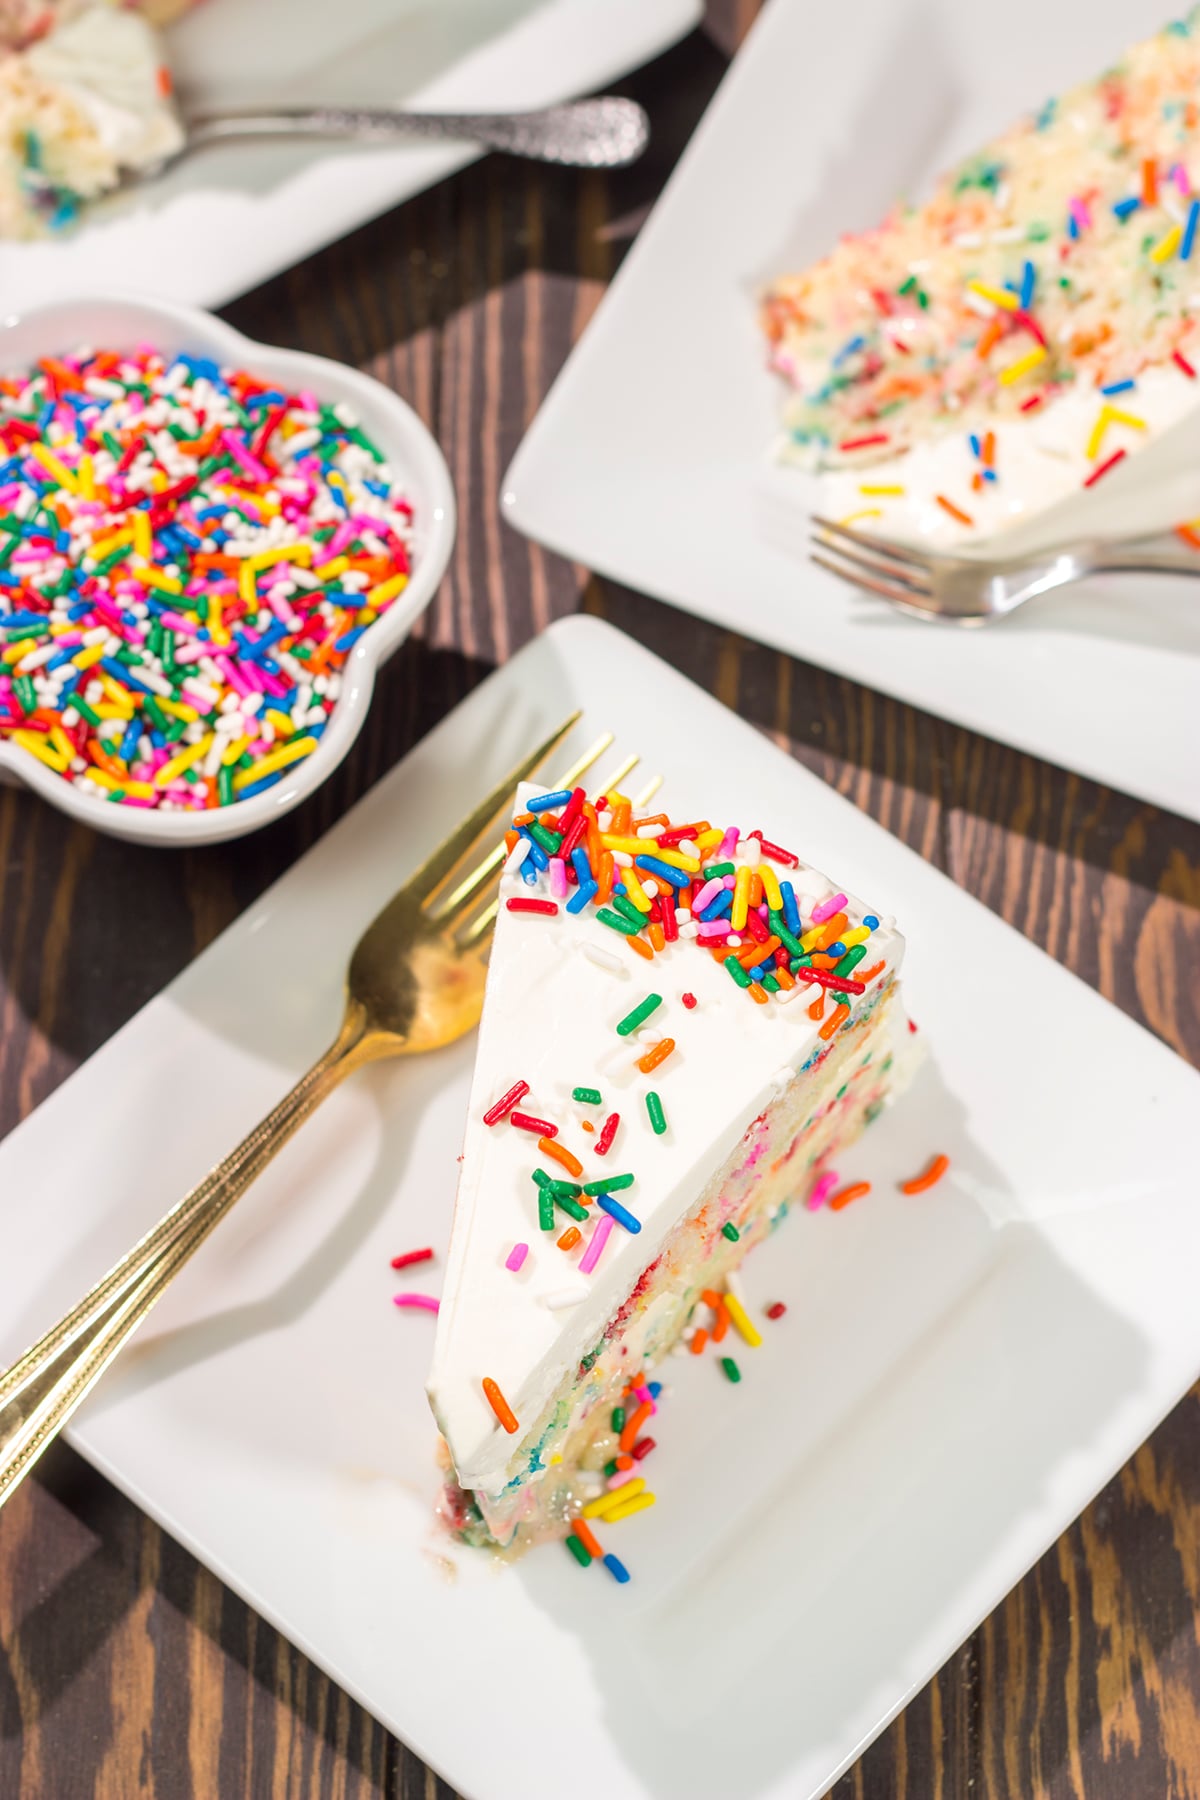
In order to make this cake at home, you’re going to need to buy the big jug of sprinkles. Technically, it’s a big jug of jimmies, but I call ’em all sprinkles. Call it whatever you’d like, but I will say that this cake is amazing!
This Funfetti Ice Cream Cake is honestly easy to make, but it does take some time. Homemade ice cream cakes have to go back into the freezer a couple of times to harden. If you try to shortcut the process, you’ll end up with an ice cream cake filled with melted (or at least very soft) ice cream inside. That’s sure to get you some strange looks from friends.
What is Funfetti Cake?
‘Funfetti’ is a term that was originally coined by Pillsbury back in the late 1980’s. It’s a combination of “fun” and “confetti,” and the concept has really taken off in recent years. You can find Funfetti boxed cake mixes and Funfetti canned frostings for every holiday and occasion. In fact, it’s a little bit overwhelming.
While anything (including martinis!?) can be Funfetti’d, I’d argue that the classic Funfetti cake is still the best. The layers of cake in this Funfetti Ice Cream Cake are basically an all-butter, vanilla cake with colorful sprinkles added. A whole bunch of sprinkles. It’s a delicious cake in its’ own right, but once it’s combined with ice cream? It’s an instant party!
How to Store Leftovers
As this cake contains a layer of ice cream, it should be stored in the freezer until shortly before you slice and serve it. Any leftovers should be returned to the freezer before the ice cream melts. I recommend slicing the cake and wrapping each leftover slice in plastic wrap. Then store the wrapped slices in a ziptop freezer bag. That way you can pull out 1-2 slices at a time as needed.
If you’re looking for a fun (and delicious!) dessert for a warm summer day, then consider making a homemade ice cream cake. This Funfetti Ice Cream Cake was a winner here in our house for sure. I hope you enjoy it as much as we do. Happy Baking!
Did you bake this Funfetti Ice Cream Cake recipe at home? Leave a comment, or snap a photo and tag me on Instagram (@Spicedblog) – I’d love to see your version!
Funfetti Ice Cream Cake
Ingredients
For the Cake
- 2 cups all-purpose flour
- 1 Tbsp baking powder
- ¼ tsp salt
- ½ cup + 2 Tbsp unsalted butter room temperature
- 1⅓ cups granulated sugar
- 1 large egg
- 3 large egg whites
- ⅔ cup whole milk
- ⅓ cup sour cream
- 1½ tsp vanilla extract
- ⅔ cup rainbow sprinkles
For the Ice Cream
- 4 cups vanilla ice cream
- ⅓ cup rainbow sprinkles
For the Whipped Cream Frosting
- 2 cups heavy whipping cream
- 1 cup confectioners’ sugar
- 1½ tsp vanilla extract
- additional rainbow sprinkles to garnish
Instructions
For the Cake
- Spray (2) 9” round cake pans with nonstick cooking spray. Line bottoms of pans with parchment paper; set prepared pans aside.
- Preheat oven to 350°F.
- Using a medium bowl, sift together the flour, baking powder and salt. Stir until well combined; set aside.
- Using a countertop mixer fitted with the paddle attachment, cream together the butter and sugar until light and fluffy (~2-3 minutes on medium speed).
- Add the egg and egg whites; mix on low speed until well combined.
- Add half of the flour mixture to the bowl; mix on low speed until well combined.
- Add the milk, sour cream and vanilla extract; mix on low speed until well combined. Add the remaining flour mixture; mix on low speed until well combined. (Tip: Don’t forget to scrape down the sides of the bowl to ensure all ingredients are fully mixed.)
- Add rainbow sprinkles; mix until well combined.
- Divide batter evenly into the two prepared cake pans.
- Bake at 350°F for 24-28 minutes, or until a toothpick inserted into the center of the cake comes out clean.
- Let cakes cool in pan for 10 minutes before turning out onto a cooling rack until completely cool.
For the Ice Cream
- Let the ice cream soften at room temperature for ~20 minutes, or until soft enough to spread easily.
- Fold the sprinkles into the softened ice cream.
- For the next step, a 9-inch springform pan is ideal as it is deep enough to hold the layers of cake and ice cream. Line the entire pan with plastic wrap. Place one layer of cake into the bottom of the pan. (Note: Don’t forget to remove the parchment paper from the bottom of each cake layer.)
- Spread the ice cream into an even layer on top and then place the second layer of cake on top of the ice cream.
- Wrap the entire cake (including pan) with plastic wrap and freeze for 3 hours or overnight.
For the Whipped Cream Frosting
- Using a medium mixing bowl, add the whipping cream, powdered sugar and vanilla extract.
- Use a hand mixer fitted with the whisk attachment to whip until stiff peaks form (~3-4 minutes).
- Remove the cake from the pan and use an offset spatula to spread whipped cream around edges and on top of the cake.
- Garnish top of cake with additional rainbow sprinkles.
- Place cake back in freezer for ~3-4 more hours (preferably overnight) before slicing and serving.
Looking for more Funfetti recipes? Check out these other favorites, too:


I need to try this soon for me BTW can’t wait to make your recipes soon for me
This ice cream cake is a fun one, Ramya – and it’s perfect for hot days!
Such a fun and cheerful dessert, David! I love anything Funfetti – this cake looks like the perfect party treat.
This really is a fun and cheerful dessert, Ben! You can’t be sad when you’ve got a slice of funfetti ice cream cake in front of you!
Funfetti is so much fun David. As you would know, here in australia we have fairybread at kids’ parties so anything with sprinkles (100s and 1000s here) is a winner! So yum! I want this cake for brunch right now – heeheehee.
sherry
I’m not sure I’m familiar with the term fairybread – I love it, though! And, yes, I do think a slice of this cake would be perfectly acceptable for brunch. 🙂
Oh this Funfetti Ice Cream Cake is just pure happiness on a plate, it’s got that big, nostalgic birthday‑party energy that makes you instantly remember arcade tokens, neon lights, and those little plastic spoons that came with ice cream cups
Happiness on a plate – I like that! And it’s pretty accurate, too. Also, those little plastic spoons with the ice cream cups. Haha – I remember those!
This homemade Funfetti Ice Cream Cake looks absolutely incredible, David! I love that you opted for a light whipped cream frosting instead of a heavy buttercream—it sounds like the perfect balance for the vanilla ice cream and colorful funfetti cake layers. I can’t wait to make this nostalgic dessert for our next summer birthday party!
Thanks so much, Betty – it’s hard to beat a good ice cream cake on a summer day, right? And the sprinkles make this one a fun dessert for celebrating!
Your ice cream cake takes me way back to when I was a kid. Back then it was all the rage to get the ice cream cakes from Dairy Queen for birthdays. Now thanks to you, I can make my own from scratch without any weird ingredients. Plus, you’ve made the process so simple. I’ll just have to make sure I give myself plenty of time so I am not tempted to rush things. I definitely don’t want those strange looks from my friends! 🙂
Oh I totally remember those days, Heidi! I haven’t had a store-bought ice cream cake in years…but they are so easy to make at home. 🙂
Steve is a huge fan of ice cream cakes and (even though he has been avoiding sugar) would drive up for a piece of this! This looks fabulous, David. When I was a kid, ice cream and cake were never a thing – it wasn’t until I was in my 20s that I had both together.
Haha – this cake is a good reason to break the “no sugar” rule! Tell Steve he deserves a slice…or two!